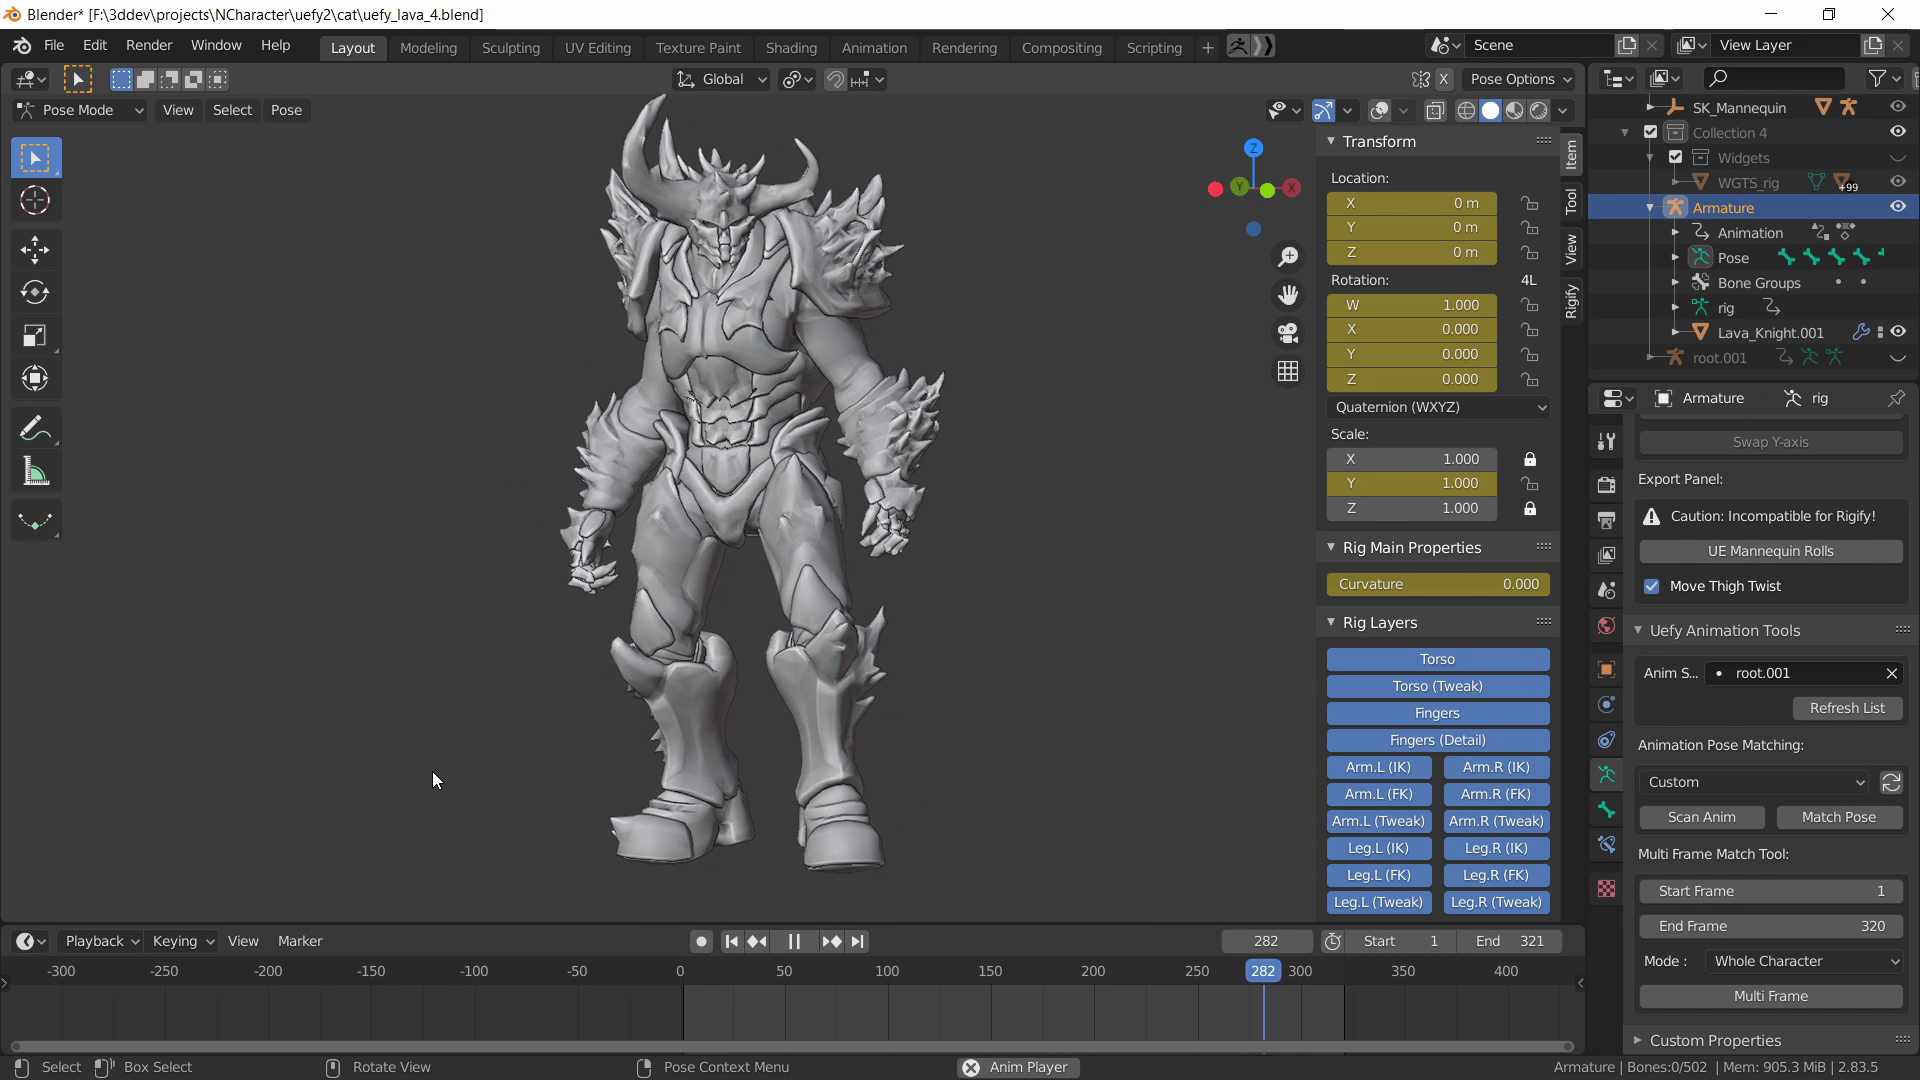
Uefy v2.6.0 released adds support for Blender 4.0

Uefy 2.0 Epic MegaGrants Recipient

The new release of Uefy 2.6 (Pro Edition) addon for Blender makes it trivial to rig all the mannequins provided in Unreal Engine 5.
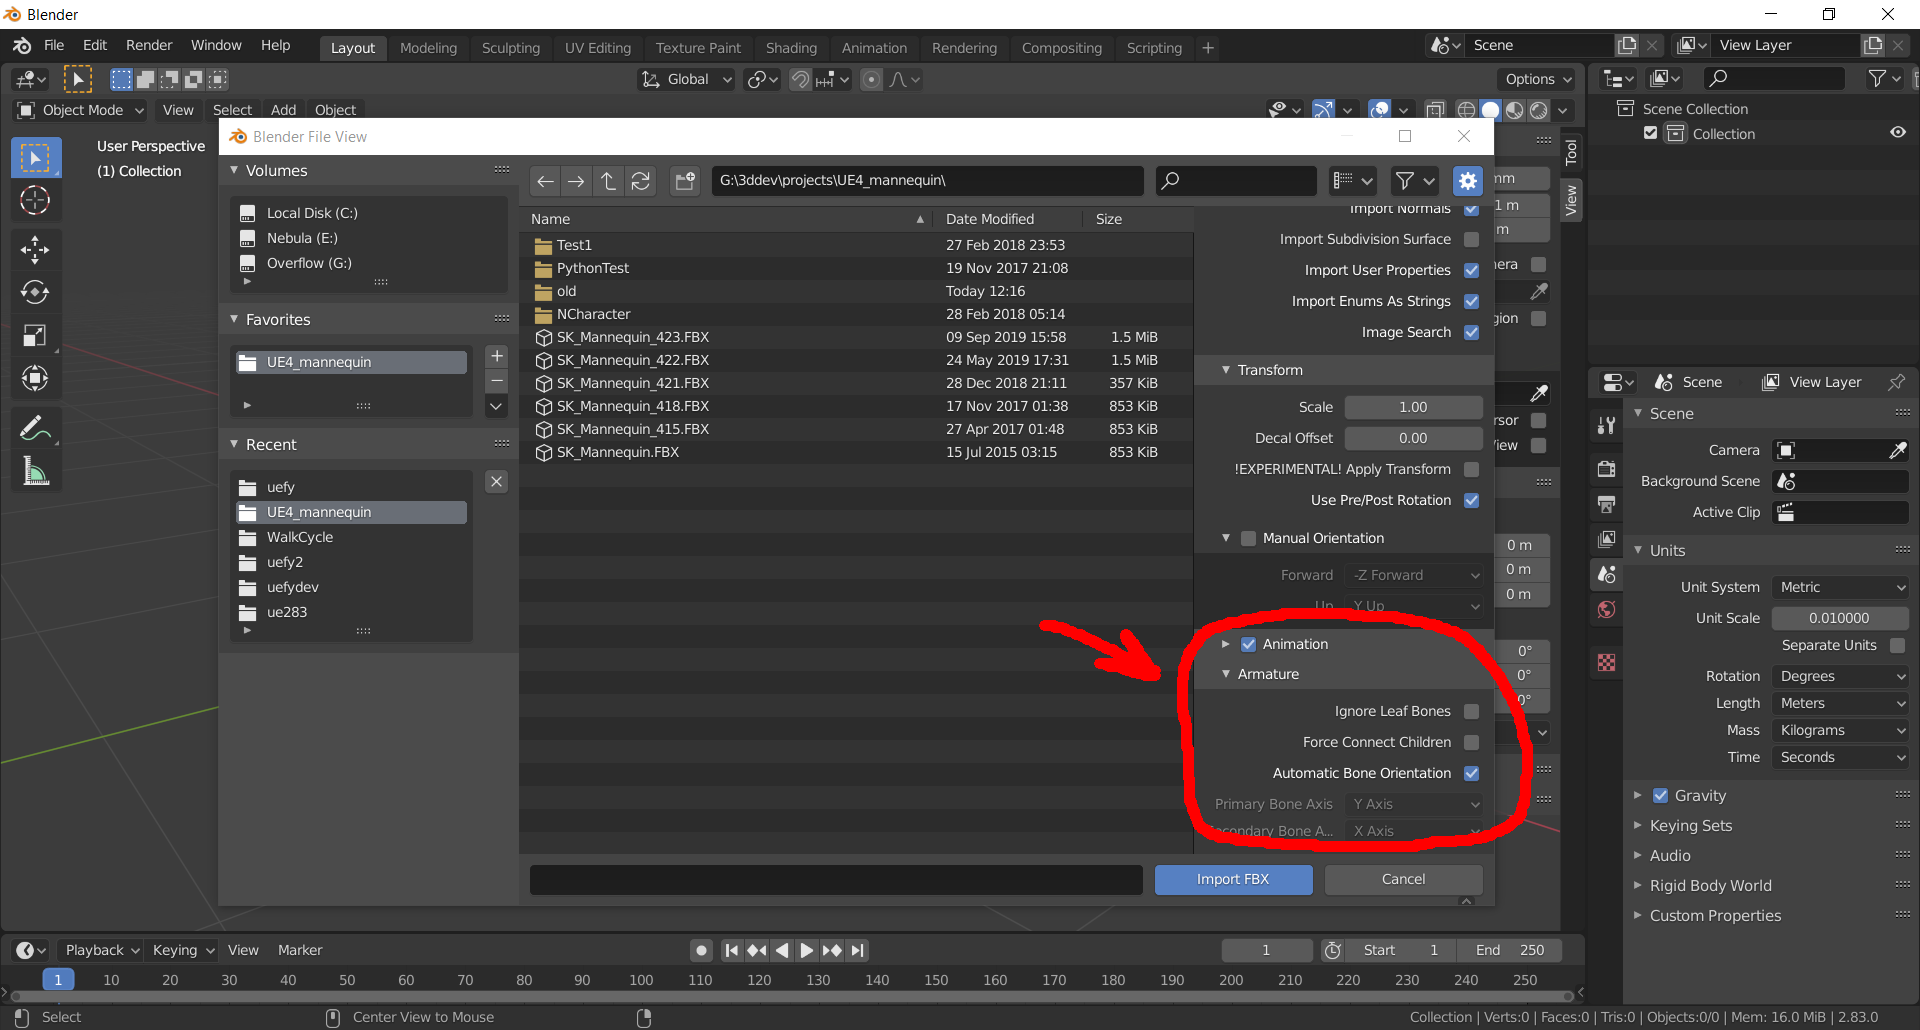
  • UE4 Mannequin
  • Manny 89 bones
  • Quinn 89 bones
  • Manny 161 bones (Experimental)
  • Quinn 161 bones (Experimental)

Uefy 2.6.0 bring compatibility with Blender 4.0 and above

Prebuilt metarigs for rigify are provided for all of these mannequin. Just need to move the mesh from the original import to the final rig.

Also rig custom characters made in Blender/Zbrush etc and from character generators such as Daz3d, Reallusion Character Creator and many others.

Uefy Script (Lite Edition)Free old version, limited to UE4 mannequin
Uefy 2.6 (Pro Edition) UE5 compatible, Advanced Functions, Rig Anything!

See product page for details: Uefy v2.6.0 (Pro Edition)

Using Match Pose feature in Uefy 2.1

Uefy v2.1 adds a new Match Pose feature that can pose the rigged character to be the same as an imported animation.

This is significant because now we can easily copy Key Frames from existing animations. Allowing us to seamlessly blend our custom animations with existing sets like those on the Unreal Marketplace.

Prior to this feature it had to be done manually. By individually moving every single control to it’s correct position in an attempt to match the pose of an existing animation.

There are Limitations

However it is important to understand the limitations of this feature and how it works to use it effectively.

Continue reading “Using Match Pose feature in Uefy 2.1”

Blender 2.83 LTS and Uefy Script

Blender has been moving forward with new updates at light speed. Many new features have been added. Including new functionality for Rigify that is really awesome. Rigify was always a good rigging system but with these new updates it can truly stand on it own against some of the more larger systems.

These new updates and changes have been transparent to Uefy Script without any breaking effects. But there are some cosmetic changes to the interface you should be aware of when following what is shown in the older youtube tutorials.

FBX Import and Export

New location for FBX import / export options

When importing or exporting FBX files the options for the armature and animation are on the right side of the dialog box. Only the location has changed. You still get the same options and they still operate the same way.

Continue reading “Blender 2.83 LTS and Uefy Script”

Using Blueprint with C++

Step by Step guide to start using C++ for Unreal Engine 4

While it may seem daunting at first, we will see Unreal Engine provides a plethora of macros and features not commonly associated with C++ to make it very easy indeed.

Blueprint is an incredibly powerful visual scripting language provided by Unreal Engine 4. It provides the ability for anyone to create compelling games with advanced graphics by drawing out logic using nodes and pins instead of writing code.

However as pure Blueprint projects grow in size. They can become difficult to manage and organise. Even a small project can require a rather large code base. Pointedly it can cause difficulty with source control and sharing work between team members. Blueprint is a stepping stone to quickly get into game development. The correct way to proceed with a production quality project is to use a combination of Blueprint and C++.

The goal is to move Logic to cpp space while retaining the ability to set settings and options for quick design changes in Blueprint. Effectively we want a C++ backend and a Blueprint frontend.

Continue reading “Using Blueprint with C++”

Blueprint for Cycling Multiple Idle Animations

What makes games really pop and come to life are the small things. One of the most important of these is variation in character idle animations. Perhaps the most iconic of which are idle and repeat click animations on peasants and grunts in the Warcraft series of video games.

Achieving the same result in Unreal Engine 4 is pretty straight forward.

First we setup some preliminary variables in the AnimBlueprint for the 3d character model that shall have multiple Idle Animations.

Then we take the first sequence pin to setup Speed and IsInAir variables. The speed variable will drive the locomotion 1D blend animations while the IsInAir variable controls animations for falling and jumping.

And lastly we take the second sequence pin to set the switch boolean “Show Wait Anim” whenever a certain amount of time has lapsed. The blueprint starts counting time if speed is zero and hence the character is not moving.

If the character moves the timer is reset, the alternative idle animation is played and the timer is reset again to replay after another time interval.

This is a very simple system that can easily be expanded for more complex animations including variations in time and order of animations. So for example a character that is standing still might look around or shuffle in place every little while for a much more realistic and convincing appearance.