
Step by Step guide to start using C++ for Unreal Engine 4
While it may seem daunting at first, we will see Unreal Engine provides a plethora of macros and features not commonly associated with C++ to make it very easy indeed.
Blueprint is an incredibly powerful visual scripting language provided by Unreal Engine 4. It provides the ability for anyone to create compelling games with advanced graphics by drawing out logic using nodes and pins instead of writing code.
However as pure Blueprint projects grow in size. They can become difficult to manage and organise. Even a small project can require a rather large code base. Pointedly it can cause difficulty with source control and sharing work between team members. Blueprint is a stepping stone to quickly get into game development. The correct way to proceed with a production quality project is to use a combination of Blueprint and C++.
The goal is to move Logic to cpp space while retaining the ability to set settings and options for quick design changes in Blueprint. Effectively we want a C++ backend and a Blueprint frontend.
Basic Setup
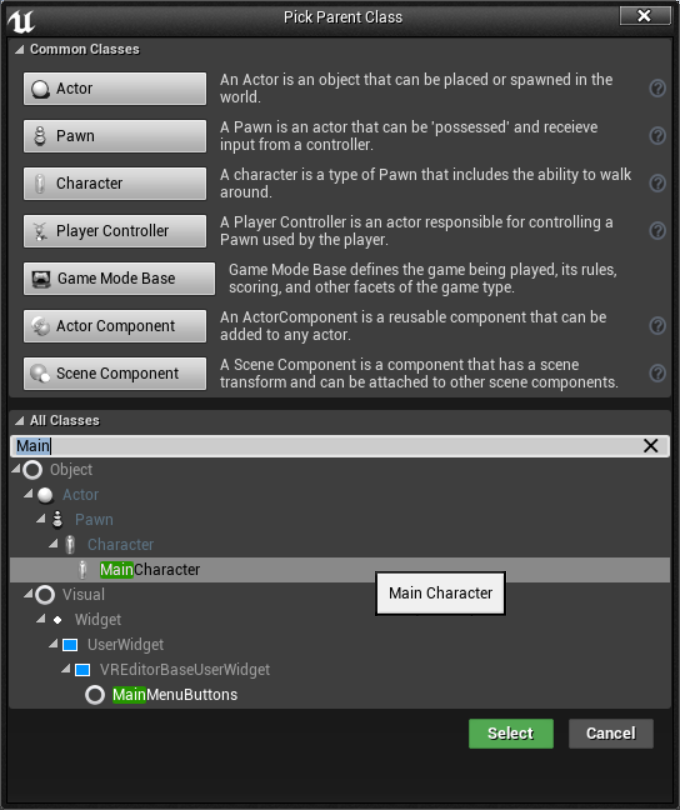
We start a new C++ project based on the Third Person Perspective template and name it “InPerson”. Click create project and check the directory where we created the project.
The files of interest are:
- InPerson.sln (Visual Studio Solution)
- InPerson.uproject (Unreal Engine Editor Project)
Now the Unreal Build tool will have given us a fully working project with a controllable character. That can be moved around in a scene. The source code for that character is in C++ and we can open the sln file to look at the code.
Just to get a better idea of how things are structured. Instead of working on this default character we will create our own from scratch.
It should be mentioned that a new project is not strictly needed. New C++ classes can be added to an existing pure Blueprint project.
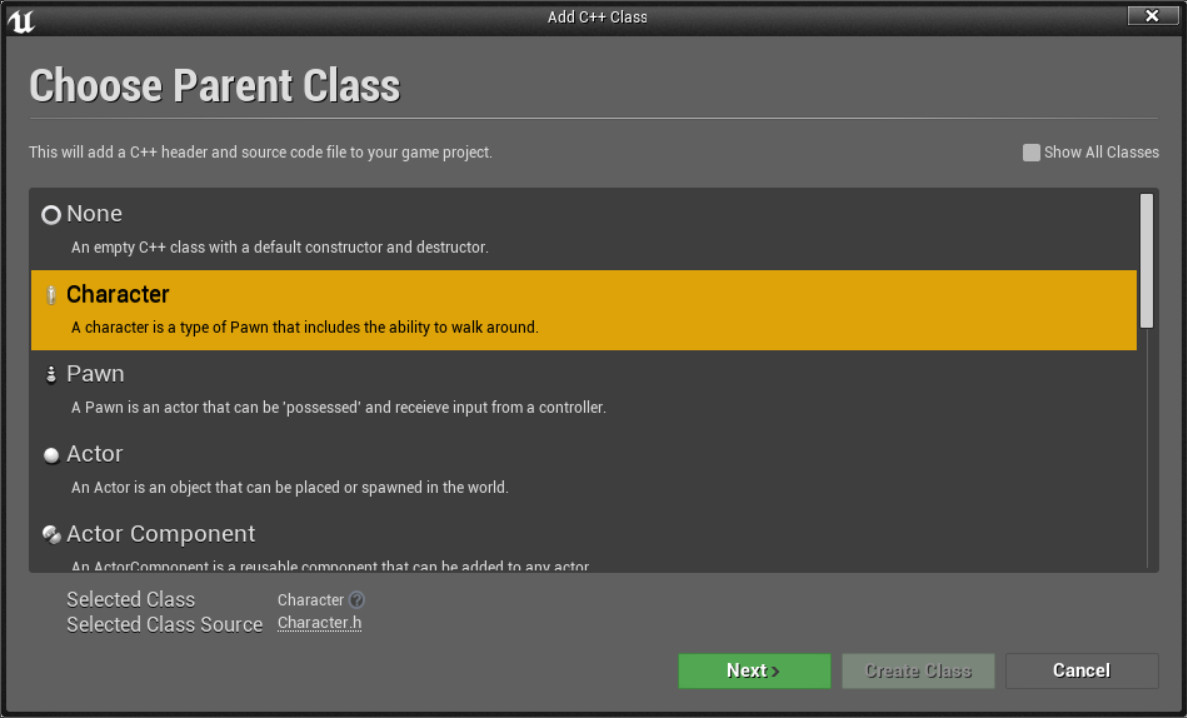
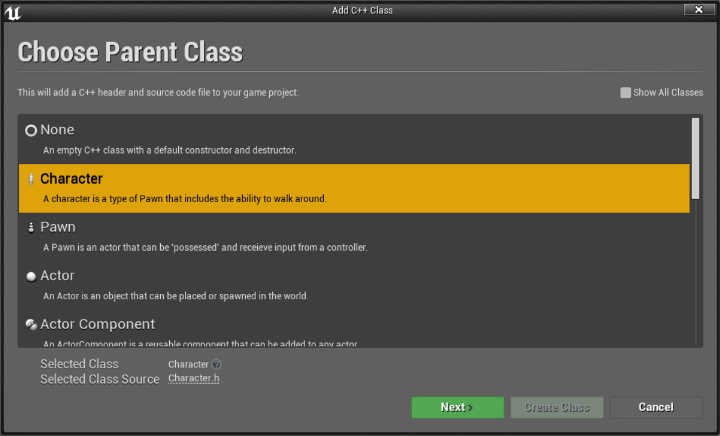
We will not use Visual Studio’s class dialog to add new files to the solution. Instead we use the UE4 Editor to create a new C++ classes. So open the Editor and select File -> New C++ Class. This displays the following dialog.
The benefit of using the Editor to create cpp files is that everything gets added properly in the project solution automatically.
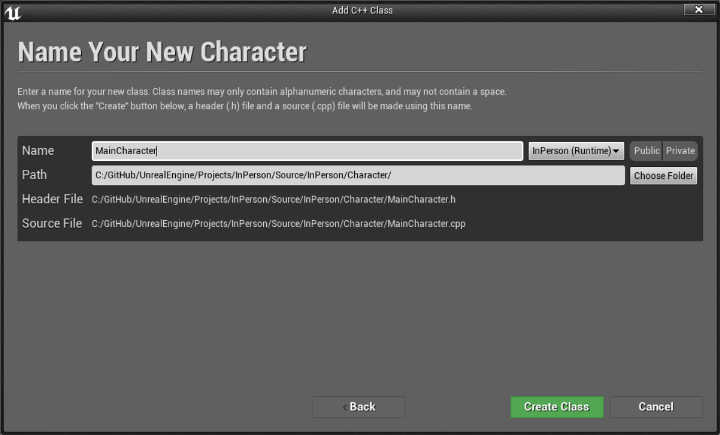
Now there is a new Sub folder named Character with the following two files:
- Source/InPerson/Character/MainCharacter.h
- Source/InPerson/Character/MainCharacter.cpp
Default Source Code
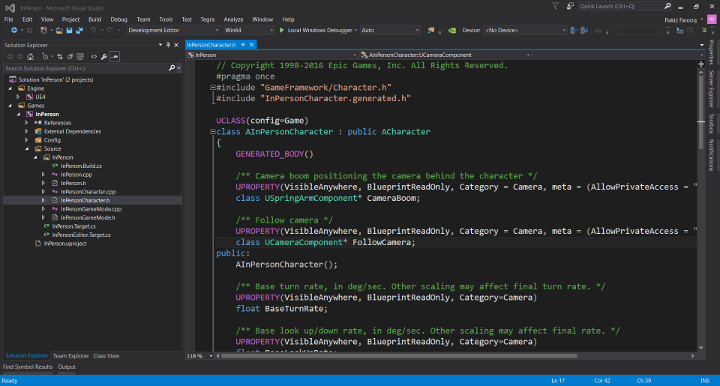
Lets Examine the default header first:
// Copyright 2017 Rakiz Farooq All Rights Reserved
#pragma once

#include "GameFramework/Character.h"
#include "MainCharacter.generated.h"

UCLASS()
class INPERSON_API AMainCharacter : public ACharacter
{
GENERATED_BODY()

public:
// Sets default values for this character's properties
AMainCharacter();

// Called when the game starts or when spawned
virtual void BeginPlay() override;

// Called every frame
virtual void Tick( float DeltaSeconds ) override;

// Called to bind functionality to input
virtual void SetupPlayerInputComponent(class UInputComponent* PlayerInputComponent) override;

};
All classes that derive from AActor must start with the letter A. Therefore since we named our class MainCharacter the actual class name becomes AMainCharacter which derives from ACharacter class.
class INPERSON_API AMainCharacter : public ACharacter
That brings us to line 4 where we include the header for the ACharacter class.
#include "GameFramework/Character.h"
Next up is the generated header include as follows:
#include "MainCharacter.generated.h"
This file doesn’t exist anywhere. When the project is compiled the Unreal Build Tool (UBT) will automatically generate it. The key point to remember is that this line must always be the last included header. So for example we will need to include many other headers they must all be above it.
Unreal Engine has its own memory management and garbage collection functionality. In effect programming in C++ with Unreal Engine is more like working with C# or Java than traditional C++ programming. In fact one can go pretty much through a whole project with ever running into new or delete statements.
Engine Macros
Notice the UCLASS() macro above the class name and GENERATED_BODY() macro just below. These macros need to be added to any class that derive from UObject. They help the engine keep track of objects.
BeginPlay() is called once at the start of play and Tick() is called on every frame. The functions are pretty self explanatory and correspond exactly with the BeginPlay and Tick nodes in Blueprint. Referencing other assets in the constructor can be problematic because they may or may not yet exist in the game world. All such references can be made in BeginPlay() because it is called after the world is ready. Tick() is where all gameplay calculations and logic is handled on every frame.
Lastly SetupPlayerInputComponent() is needed to tie mouse, keyboard or controllers to the character so it can respond to user input.
C++ Source Code
<br>
// Copyright 2017 Rakiz Farooq All Rights Reserved</p>
<p>#include "InPerson.h"<br>
#include "MainCharacter.h"</p>
<p>// Sets default values<br>
AMainCharacter::AMainCharacter()<br>
{<br>
// Set this character to call Tick() every frame. You can turn this off to improve performance if you don't need it.<br>
PrimaryActorTick.bCanEverTick = true;</p>
<p>}</p>
<p>// Called when the game starts or when spawned<br>
void AMainCharacter::BeginPlay()<br>
{<br>
Super::BeginPlay();</p>
<p>}</p>
<p>// Called every frame<br>
void AMainCharacter::Tick( float DeltaTime )<br>
{<br>
Super::Tick( DeltaTime );</p>
<p>}</p>
<p>// Called to bind functionality to input<br>
void AMainCharacter::SetupPlayerInputComponent(UInputComponent* PlayerInputComponent)<br>
{<br>
Super::SetupPlayerInputComponent(PlayerInputComponent);</p>
<p>}<br>
The default cpp file is very bare bones but it represents a valid ACharacter class. The project solution can be compiled with no errors. Before we go any further with modifying the character or adding components, let us setup the Blueprint frontend for this C++ class.
Open the UE4 Editor and select the folder we want to use. Create a new Blueprint and search for MainCharacter under the ‘All Classes’ dropdown.
Doing so creates a new Blueprint, open it and select the Mesh component in the Blueprint. Pick the mesh for this character. The default mesh should be SK_Mannequin. Drag and rotate the mesh so it faces the capsule’s forward vector.
Keep in mind existing Blueprints can also be reparented to a C++ class. We do not strictly need to create a new Blueprint.
Best of Both Worlds
The next time the blueprint is opened it might show no viewport and there will be a message like:
NOTE: This is a data only blueprint, so only the default values are shown. It does not have any script or variables. If you want to add some, Open Full Blueprint Editor
This is precisely what we want. We have a Blueprint with a C++ native backend. We can select any mesh, set and change any default values in the Editor all the while without anything being hardcoded in C++. At the same time all logic and calculations will be done in C++ without any of the overhead of Blueprint.
Therefore we maintain both performance and flexibility at the same time.
Review
In this article we setup a new C++ project. Decided to create a Character from scratch. Used the editor to create the default source code. Then created a Blueprint and linked it to our native code.
Next Steps
Right now the Blueprint doesn’t do much but it is a valid asset that can be dragged into the game scene. In the next articles of this series we will start adding components and logic to control the character. We will also take a look at animation and getting the character to a game ready state.
Subscribe on Social Channels to keep updated.